

A plumbing rough-in is defined as the installation of all water supply lines, drain-waste-vent pipes, and pipe stubs inside open walls, floors, and ceilings before any finishing surfaces are applied. This phase happens after framing is complete but before drywall, tile, or cabinetry goes in. No faucets, toilets, or sinks are installed yet. Those come later during finish plumbing. Getting the rough-in right is the single most consequential decision in any new build or renovation, because every fixture in your home depends on what gets buried in those walls.
What is a plumbing rough-in, and what happens during it?
The rough-in phase covers every pipe that will eventually be hidden from view. A licensed plumber installs the full network of water supply lines, drain pipes, vent pipes, pipe supports, and stub-outs during this stage. Stub-outs are short pipe ends that protrude from the wall or floor, waiting for fixtures to connect to them later.
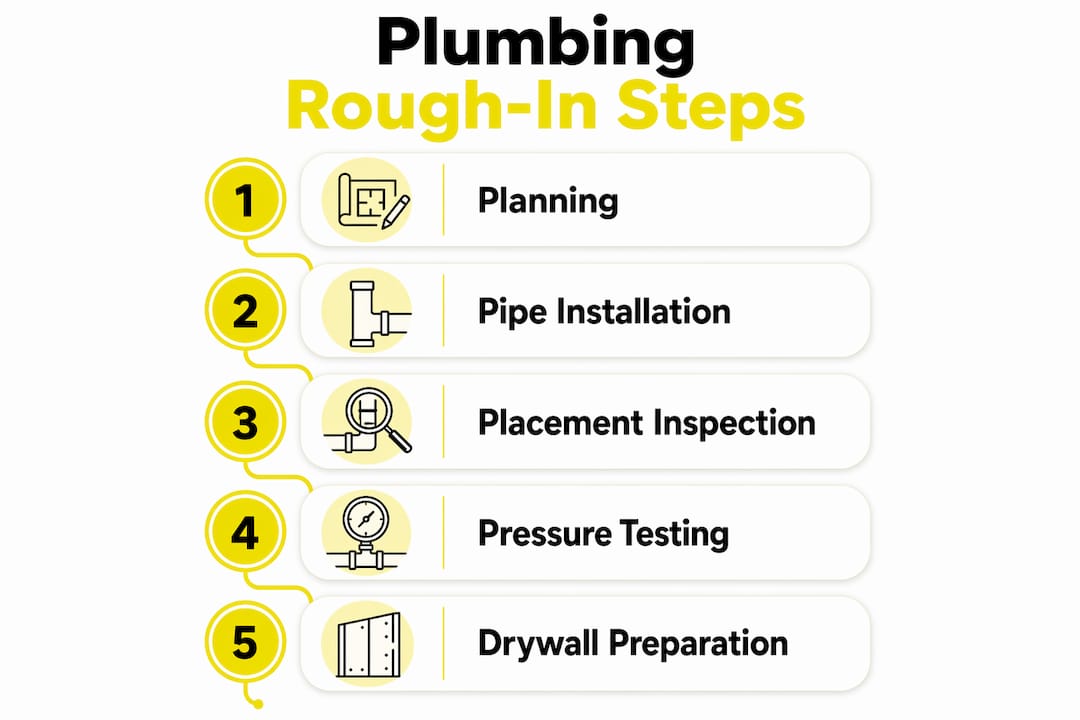
The sequence within a construction project follows a clear order:
- Framing is completed. Walls, floors, and ceilings are open and accessible.
- Supply lines are run. Hot and cold water lines are routed from the main supply to each fixture location.
- Drain and waste pipes are installed. These carry wastewater away from sinks, tubs, showers, and toilets.
- Vent pipes are added. Vents connect the drain system to the outside air, preventing siphoning and keeping sewer gases out of your home. Learn more about how vents function before your rough-in begins.
- Pipe supports and nail plates are secured. Steel nail plates are installed over studs where pipes pass through, protecting them from drywall screws and nails during later finish work.
- Stub-outs are positioned. Each stub-out is placed at the exact location of a future fixture.
- Pressure testing is performed. The entire system is pressurized to check for leaks before walls are closed.
- Building inspector approval is obtained. All rough-in systems must pass a pressure test and receive inspector sign-off before any drywall goes up.
Pro Tip: Schedule your inspection before ordering drywall. Inspectors sometimes request minor adjustments, and making changes with open walls costs a fraction of what it costs after drywall is installed.
What are the technical requirements for plumbing rough-in?
The plumbing rough-in process follows strict technical standards. These are not suggestions. They are code requirements enforced by building inspectors across Massachusetts and most of the United States.
| Requirement | Standard |
|---|---|
| Drain pipe slope | 1/4 inch per foot minimum toward the sewer |
| Toilet drain placement | 12 inches from finished wall to drain center |
| Vent pipe sizing | Matches drain pipe diameter per local code |
| Pressure test | Required before wall closure |
| Nail plate protection | Required where pipes pass through studs |
The drain pipe slope of 1/4 inch per foot is the most commonly violated standard. Too little slope causes water to stagnate in the pipe. Too much slope causes water to rush ahead of solids, leaving debris behind. Both lead to chronic clogs.
The toilet drain placement of exactly 12 inches from the finished wall to the drain center is another measurement that trips up homeowners who buy their toilet after the rough-in is done. Standard toilets are built around this measurement. A variance of even an inch or two forces you to buy a non-standard fixture or redo the drain.
Proper pipe sizing and venting distances prevent siphoning, which is when water gets pulled out of your drain traps, allowing sewer gases to enter the home. Undersized vent pipes are a frequent cause of gurgling drains and foul odors that homeowners later struggle to diagnose.
Pro Tip: Ask your plumber to show you the drain slope on every horizontal run before the inspection. A simple level and tape measure confirm compliance in under five minutes.
Why is the rough-in phase so critical to get right?
The rough-in sets the permanent hidden skeleton of your plumbing system. Once walls close, that skeleton is locked in place. Correcting errors after walls are sealed requires demolition, which adds significant cost and time to any project.
Here is what goes wrong when homeowners treat the rough-in as a formality:
- Fixture misalignment. Choosing a toilet, vanity, or tub after the rough-in is done often reveals that the stub-outs are in the wrong position. Moving them means opening walls.
- Chronic drainage problems. Incorrect drain slope leads to water stagnation and recurring clogs. These problems require wall demolition to fix permanently.
- Sewer gas infiltration. Improperly sized or missing vent pipes allow sewer gases into the living space, creating health risks and odor complaints.
- Water damage from hidden leaks. A small leak behind drywall may go undetected for months. By the time it shows up as a stain or mold, the damage is extensive.
- Failed inspections. A failed rough-in inspection delays the entire project. Every trade that follows plumbing, including electrical and insulation, gets pushed back.
The rough-in is the highest-stakes investment in your home’s plumbing infrastructure precisely because it cannot be easily modified later. Homeowners who understand this invest more attention here than anywhere else in the project. Understanding how plumbing inspections work before construction begins puts you in a much stronger position to catch problems early.
How to prepare and plan for a plumbing rough-in
Planning the rough-in before a single pipe is cut saves money and prevents the most common mistakes. Major fixture layout decisions must be finalized before the rough-in begins. Changing them afterward is expensive.
- Finalize every fixture location on paper first. Work with your plumber to confirm the exact position of every toilet, sink, shower, tub, and appliance before any pipe is ordered. Measure twice, cut once applies here more than anywhere.
- Select your fixtures before the rough-in starts. Each fixture has specific rough-in dimensions. A toilet with a 10-inch rough-in requires different drain placement than a standard 12-inch model. Buy the fixture first, then rough-in to match it.
- Understand the inspection timeline. Your plumber pulls the permit. The inspector schedules a visit after the rough-in is complete but before walls close. Build this window into your project schedule so you are not rushing the inspection.
- Request a walkthrough before wall closure. Walk the space with your plumber and confirm pipe placements and slopes before drywall goes up. Look at every stub-out location and compare it to your fixture plan.
- Plan cleanout access points. Minimizing pipe length and planning cleanouts during rough-in makes future maintenance far easier. A cleanout installed now costs almost nothing. Adding one after walls close costs significantly more.
- Coordinate with other trades. Plumbing rough-in happens alongside electrical and HVAC rough-in. Pipes and wires share the same wall cavities. Confirm with your general contractor that each trade knows where the others are running their systems.
A well-planned rough-in also pays dividends years later. Homeowners who follow a plumbing maintenance checklist find that systems with clean, code-compliant rough-ins are far easier to service and diagnose.
Key Takeaways
A plumbing rough-in is the foundation of every reliable home plumbing system, and errors made here cost far more to fix than errors made anywhere else in a renovation.
| Point | Details |
|---|---|
| Definition of rough-in | Rough-in installs all hidden supply, drain, and vent pipes before walls close. |
| Drain slope standard | Building codes require a minimum 1/4 inch per foot slope on all drain pipes. |
| Toilet drain placement | The standard distance is 12 inches from the finished wall to the drain center. |
| Inspection is mandatory | All rough-in work must pass a pressure test and inspector approval before drywall. |
| Plan fixtures first | Select every fixture before rough-in begins to avoid costly stub-out repositioning. |
What I’ve learned after years of rough-in work
Most homeowners I talk to treat the rough-in as a box to check. They focus on tile selections, cabinet finishes, and paint colors while the plumber works behind the scenes. That is exactly backwards.
The rough-in is where the real decisions happen. Every fixture location, every drain slope, every vent connection gets locked in permanently once drywall goes up. I have seen beautiful kitchen renovations turn into expensive disasters because a homeowner chose their farmhouse sink after the rough-in was done and the drain stub-out was six inches off.
The misconception I hear most often is that rough-in is just “running some pipes.” It is not. It is a precise, code-governed installation that requires accurate measurements, proper material selection, and a licensed inspector’s sign-off. Treating it casually is how you end up with sewer gas in your bathroom or a toilet that rocks because the drain is an inch too far from the wall.
My advice is simple. Be present during the rough-in. Ask your plumber to walk you through every stub-out location before they leave the site. Bring your fixture spec sheets and compare the rough-in dimensions on the ground. It takes thirty minutes and can save you thousands.
The homeowners who get the best results are the ones who ask questions early, not after the drywall is up.
— Matt
Mysticvalleyservices and your rough-in: what to expect
Mysticvalleyservices handles plumbing rough-ins for homeowners across Massachusetts, from new construction to full gut renovations. Every rough-in job includes permit pulling, pressure testing, and coordination with the building inspector so nothing gets missed before walls close.

The team at Mysticvalleyservices reviews fixture specs with you before a single pipe is cut, confirming drain placement, vent sizing, and stub-out locations against your actual fixture dimensions. That upfront review is what prevents the costly surprises that show up after drywall. Homeowners who want ongoing protection after the rough-in is done can also explore preventive plumbing contracts that keep the system in top condition long after construction wraps. To schedule a rough-in consultation or learn more about the full range of plumbing services available in Massachusetts, reach out to Mysticvalleyservices directly.
FAQ
What is the plumbing rough-in definition in simple terms?
A plumbing rough-in is the installation of all water supply, drain, and vent pipes inside open walls and floors before any finishing surfaces are applied. No fixtures like faucets or toilets are installed during this phase.
What comes after the plumbing rough-in?
After the rough-in passes inspection and walls are closed, finish plumbing begins. Finish plumbing connects visible fixtures like sinks, toilets, showers, and faucets to the stub-outs left during rough-in.
What is the standard toilet rough-in distance?
The standard toilet rough-in distance is 12 inches from the finished wall to the center of the drain. Variance from this measurement causes fixture misalignment and may require a non-standard toilet.
Does rough-in plumbing require an inspection?
Yes. All rough-in plumbing must pass a pressure test for leaks and receive building inspector approval before walls are closed. Skipping this step violates building code and creates serious liability.
How long does the plumbing rough-in process take?
The timeline varies by project size, but a typical single-family home rough-in takes two to five days for the plumbing work, plus additional time for the scheduled inspection. Coordinating the inspection early prevents project delays.