

Winterizing home plumbing is the process of protecting your pipes, fixtures, and water lines from freezing temperatures before cold weather arrives. Massachusetts homeowners face real financial risk every winter: nearly half of homeowner insurance claims in 2024 were tied to non-flood water losses and freezing damage. That number reflects how predictable and preventable this problem is. When you prep home plumbing for winter in Massachusetts, you are not just protecting pipes. You are protecting your insurance coverage, your home’s structure, and your wallet.
What tools and materials do you need to winterize plumbing in Massachusetts?
The right materials make winterization faster and more effective. Gather everything before temperatures drop, because cold snaps in Massachusetts can arrive quickly in october and november.
Core materials you need:
- Foam pipe insulation sleeves: Pre-split foam tubes that slip over copper or PVC pipes. Use these in basements, crawl spaces, and attics.
- Heat-tracing cables: Electric cables that run along pipes to prevent freezing. Heat-tracing cables come in two types: self-regulating and constant wattage. Self-regulating cables adjust their heat output based on ambient temperature, which saves energy and reduces overheating risk.
- Aluminum-foil tape: Used to secure heat cables against the pipe surface before wrapping with insulation. Standard duct tape fails in cold and damp conditions.
- Outdoor faucet covers: Insulated dome-shaped covers that fit over exterior spigots. They cost under $10 each and block wind and cold air from reaching the valve.
- Pipe wrap insulation: Fiberglass or rubber tape for irregular pipe shapes and fittings that foam sleeves cannot cover.
Safety equipment to have on hand:
- Work gloves for handling fiberglass insulation
- A flashlight or headlamp for crawl spaces and attics
- A utility knife for cutting foam sleeves to length
Pro Tip: Install heat cables on the bottom of the pipe, not the top. Heat rises, so bottom placement distributes warmth more evenly along the pipe surface.
| Insulation type | Best use | Key advantage |
|---|---|---|
| Foam sleeve | Straight pipe runs | Fast to install, low cost |
| Fiberglass wrap | Irregular fittings | Conforms to any shape |
| Self-regulating heat cable | Unheated spaces | Adjusts output automatically |
| Constant wattage heat cable | Short pipe sections | Consistent heat output |
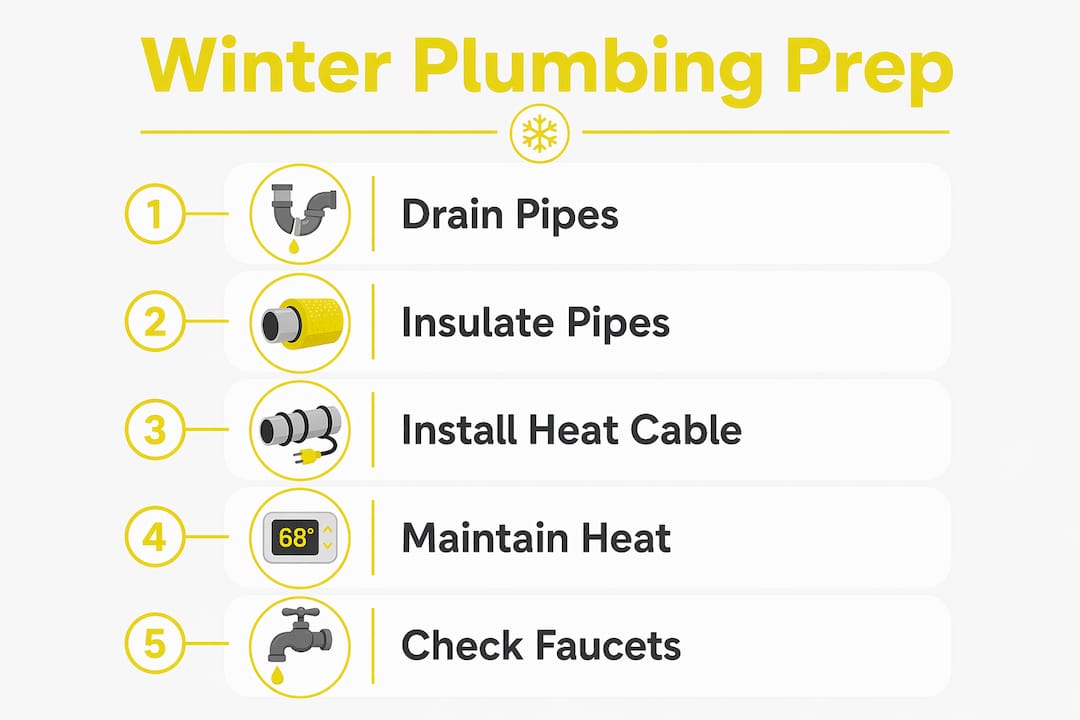
How to prep home plumbing for winter: indoor steps
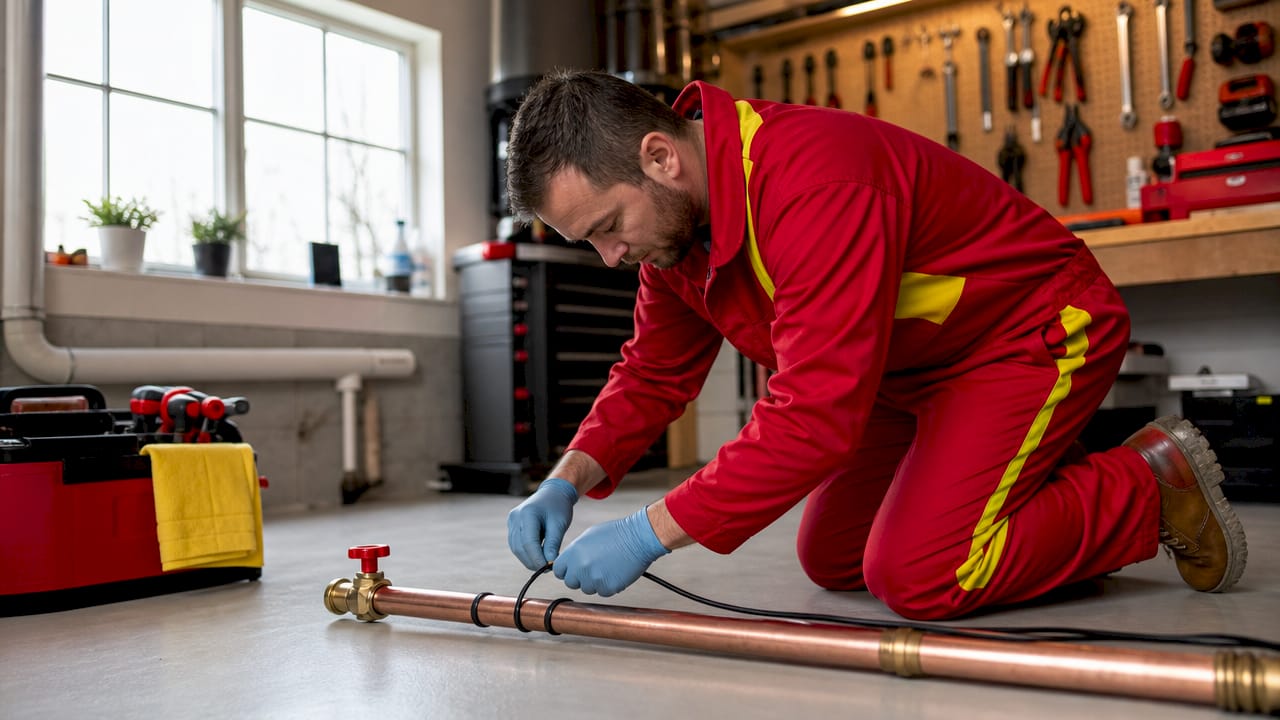
Insulating pipes in unheated spaces like basements, attics, and crawl spaces is the single most effective step you can take. Combine insulation with heat cables for maximum protection in areas that regularly drop below freezing.
Follow these steps in order before the first hard freeze:
- Locate all exposed pipes in unheated areas. Check the basement, garage, crawl space, and attic. Any pipe in a space without active heating is at risk.
- Wrap pipes with foam insulation sleeves. Cut sleeves to length with a utility knife and seal seams with aluminum-foil tape. Do not leave gaps at joints or elbows.
- Install heat cables where insulation alone is not enough. Run the cable along the bottom of the pipe, secure it with foil tape every 12 inches, then wrap the entire pipe with insulation over the cable.
- Open cabinet doors under sinks on exterior walls. Opening cabinet doors allows warm indoor air to circulate around the pipes beneath your kitchen and bathroom sinks. This is especially useful during overnight cold snaps.
- Set your thermostat to at least 55°F when you are home and 50°F when you are away. Massachusetts insurance guidelines require these minimum temperatures for coverage compliance. Dropping below these thresholds can result in a denied claim if a pipe bursts while you are traveling.
- Let faucets drip slightly during extreme cold. Moving water is less likely to freeze inside pipes. A slow drip from both hot and cold handles on faucets served by exterior wall pipes is enough to reduce pressure buildup.
- Locate your main water shutoff valve. Knowing where your shutoff valve is before an emergency saves critical time if a pipe bursts. Test it now to confirm it turns freely.
Pro Tip: Never use a space heater aimed directly at a single pipe section to warm it quickly. Rapid, uneven heating causes thermal stress and can crack older copper or PVC pipes.
How do you prepare outdoor plumbing for winter?
Outdoor plumbing fails first in a Massachusetts winter. Disconnecting garden hoses, draining outdoor faucets, and sealing foundation cracks are the three most important outdoor tasks. Outdoor pipe exposure is a leading cause of winter plumbing failures, and most of the damage is preventable with one afternoon of work.
Outdoor winterization checklist:
- Shut off the interior valve that feeds each outdoor spigot. Most homes have a dedicated shutoff inside the basement or crawl space for each exterior faucet.
- Disconnect and drain all garden hoses. Water left in a connected hose creates back pressure that pushes ice into the valve body. Store hoses indoors or in a heated garage.
- Open the outdoor faucet to drain remaining water. After shutting the interior valve, open the exterior spigot fully and leave it open until all water drains out. Then close it.
- Drain irrigation and sprinkler systems completely. Blow out irrigation lines with compressed air or use the manual drain valves on each zone. Water trapped in underground lines can crack fittings.
- Install insulated faucet covers over every exterior spigot. These covers add a layer of protection even after draining, blocking wind chill from reaching the valve.
- Seal foundation cracks near pipe entry points. Cold air enters through gaps in the foundation and drops the temperature around pipes that run through the sill plate. Use hydraulic cement or foam backer rod to close gaps larger than a quarter inch.
How do you safely thaw frozen pipes?
A frozen pipe does not always burst immediately, but the pressure buildup inside is dangerous. Act quickly and carefully when you suspect a pipe has frozen.
Safe thawing methods:
- Use a hair dryer on a low or medium setting, moving it back and forth along the frozen section.
- Apply a heating pad wrapped around the pipe and secured with a towel.
- Soak towels in hot water and wrap them around the frozen section, replacing them as they cool.
Safe thawing methods include hair dryers, heating pads, and hot towels. Open flames, blowtorches, and propane heaters are prohibited. Rapid heating can crack pipes and ignite nearby insulation or wood framing.
“Never use a blowtorch, propane or butane heater, charcoal stove, or any other open flame device to thaw a frozen pipe. These methods create a serious fire hazard and can cause more damage than the freeze itself. Start from the faucet end and work toward the frozen section to allow steam to escape.” — Massachusetts public safety guidance on frozen pipe thawing
Steps to follow during a freeze event:
- Open the faucet served by the frozen pipe before you start thawing. This relieves pressure and lets you confirm when water begins flowing again.
- Work from the faucet end toward the coldest section of pipe.
- If you cannot locate the frozen section or the pipe has already burst, shut off the main water supply immediately.
- Call a licensed plumber if the frozen pipe is inside a wall, under a slab, or in a location you cannot safely access.
Common mistakes homeowners make in winter plumbing prep
Most winter plumbing failures trace back to a short list of avoidable errors. Recognizing these mistakes before the season starts is the fastest way to reduce your risk.
- Leaving the home unheated during travel. Dropping the thermostat below 50°F to save on heating costs is the most common reason insurance claims get denied. The savings on your gas bill will not cover a burst pipe repair.
- Forgetting to drain outdoor water lines. Homeowners often shut off the interior valve but never open the outdoor spigot to drain the remaining water. That trapped water freezes and splits the valve body.
- Using unsafe thawing methods. Open flames and propane torches cause house fires. Stick to gradual heat sources every time.
- Ignoring plumbing vents and water meters. Outdoor water meters and vent pipes that protrude through the roof can freeze and block drainage. Insulate accessible meter boxes and check that vent pipes are clear of ice and snow.
- Assuming insurance covers all freeze damage. Standard policies require minimum indoor temperatures and proper home maintenance. Skipping winterization steps can void your coverage for a freeze-related claim.
Pro Tip: Take photos of your insulated pipes, heat cable installations, and thermostat settings before you leave for a winter trip. Dated photos serve as documentation if you ever need to file an insurance claim.
Key Takeaways
Proactive winterization, including pipe insulation, minimum indoor temperatures of 50–55°F, and draining outdoor lines, is the most reliable way to prevent frozen pipes and protect your insurance coverage in Massachusetts.
| Point | Details |
|---|---|
| Insulate exposed pipes | Wrap pipes in unheated spaces with foam sleeves and heat cables before temperatures drop. |
| Maintain minimum temperatures | Keep your home at 55°F when occupied and 50°F when vacant to stay within insurance guidelines. |
| Drain all outdoor plumbing | Shut off interior valves, disconnect hoses, and open outdoor spigots to remove trapped water. |
| Thaw pipes safely | Use hair dryers or heating pads only. Never use open flames, which cause fires and crack pipes. |
| Know your shutoff valve | Locate and test your main water shutoff before winter so you can act fast in an emergency. |
What I’ve learned after years of Massachusetts winters
Every february, I see the same pattern. A homeowner leaves for a long weekend, sets the thermostat to 45°F to cut costs, and comes home to a burst pipe in the basement. The repair bill runs into thousands of dollars. The insurance company denies the claim because the home was not maintained at the required minimum temperature. That scenario is entirely preventable, and it happens every single year.
The part that surprises most homeowners is how little the prevention actually costs. A set of foam pipe sleeves, a heat cable for the most exposed run, and a $10 faucet cover for each outdoor spigot will handle most of the risk. The bigger investment is time, specifically one afternoon in october or early november before the first hard freeze arrives.
I also think homeowners underestimate the value of knowing where their main shutoff valve is. I have been on emergency calls where a pipe burst and the homeowner spent 20 minutes searching for the shutoff while water poured into the basement. That is 20 minutes of damage that did not need to happen. Find it now, label it, and make sure everyone in your household knows where it is.
The insurance angle matters more than most people realize. Massachusetts policies are specific about temperature requirements, and insurers do investigate claims. Keeping a simple log of your thermostat settings and taking photos of your winterization work takes five minutes and can protect a claim worth tens of thousands of dollars.
— Matt
Mysticvalleyservices is ready for your winter plumbing needs
Winter plumbing prep is straightforward when you know the steps. But some situations call for a professional, whether that means installing heat cables in a hard-to-reach crawl space, pressure-testing your outdoor shutoffs, or responding to a burst pipe at 2 AM.

Mysticvalleyservices provides plumbing winterization services across Massachusetts, from pipe insulation and heat cable installation to emergency freeze response. The team also handles preventive maintenance inspections before the season starts, so you catch small problems before they become expensive ones. Check the areas we serve to confirm coverage in your town, and schedule your winterization appointment before the first cold snap hits.
FAQ
What temperature should I keep my home at to prevent frozen pipes?
Keep your home at a minimum of 55°F when you are present and 50°F when you are away. Massachusetts insurance guidelines require these minimums for coverage compliance on freeze-related claims.
When should I start winterizing my plumbing in Massachusetts?
Start in october, before the first hard freeze. Completing insulation, outdoor draining, and heat cable installation before november gives you a reliable buffer against early cold snaps.
How do I know if a pipe is frozen?
Turn on a faucet and check for little or no water flow. A frozen pipe often produces a trickle or nothing at all. Check pipes in unheated areas like the basement or crawl space first.
Can I thaw a frozen pipe myself?
Yes, if the pipe is accessible and has not burst. Use a hair dryer or heating pad and work from the faucet end toward the frozen section. Call a licensed plumber if the pipe is inside a wall or has already cracked.
Does homeowner’s insurance cover burst pipes from freezing?
Standard policies cover freeze damage only when the home was properly maintained and heated. Failing to meet minimum temperature requirements or leaving outdoor lines undrained can result in a denied claim.